Templates
In WP Next Editor, a template is a Lexical-based document stored as JSON. Every element on the canvas — its content, layout, styles, animations, and data bindings — is serialized into the template's JSON representation and stored in the WordPress database.
The editor allows you to build, preview, and publish templates entirely within the browser.
How templates are stored in WordPress
Templates use two storage locations depending on their state:
| State | Storage | How it gets there |
|---|---|---|
| Preview / auto-save | wp_postmeta | Saved automatically every 30 seconds, and when you click Save in the Header Toolbar |
| Published | wp_posts.post_content | Saved when you click Publish in the Header Toolbar |
The public-facing page renderer reads from wp_posts.post_content — so changes are not visible to site visitors until the template is published.
Previous preview saves are retained and accessible from the preview history icon in the Header Toolbar, allowing you to revert to an earlier draft if needed.
Publishing and making a template public
Two steps are required before a template is accessible at its public URL:
- Publish the template (Header Toolbar → Publish)
- Set the status to visible (Header Toolbar → status control)
Once both are set, a View Page link appears in the Header Toolbar so you can navigate directly to the live page.

Public page URL
A published template is accessible at:
https://[domain]/[slug]
The slug is set in Template Settings (see Template Settings below) and can be updated after initial creation.
Template JSON Viewer
The raw JSON of the current template can be opened from the Footer Toolbar → gear icon → JSON Editor. The modal shows the full Lexical editor state and allows direct editing — changes take effect immediately when saved.
See JSON Editor for details on editing, validation, and error recovery.
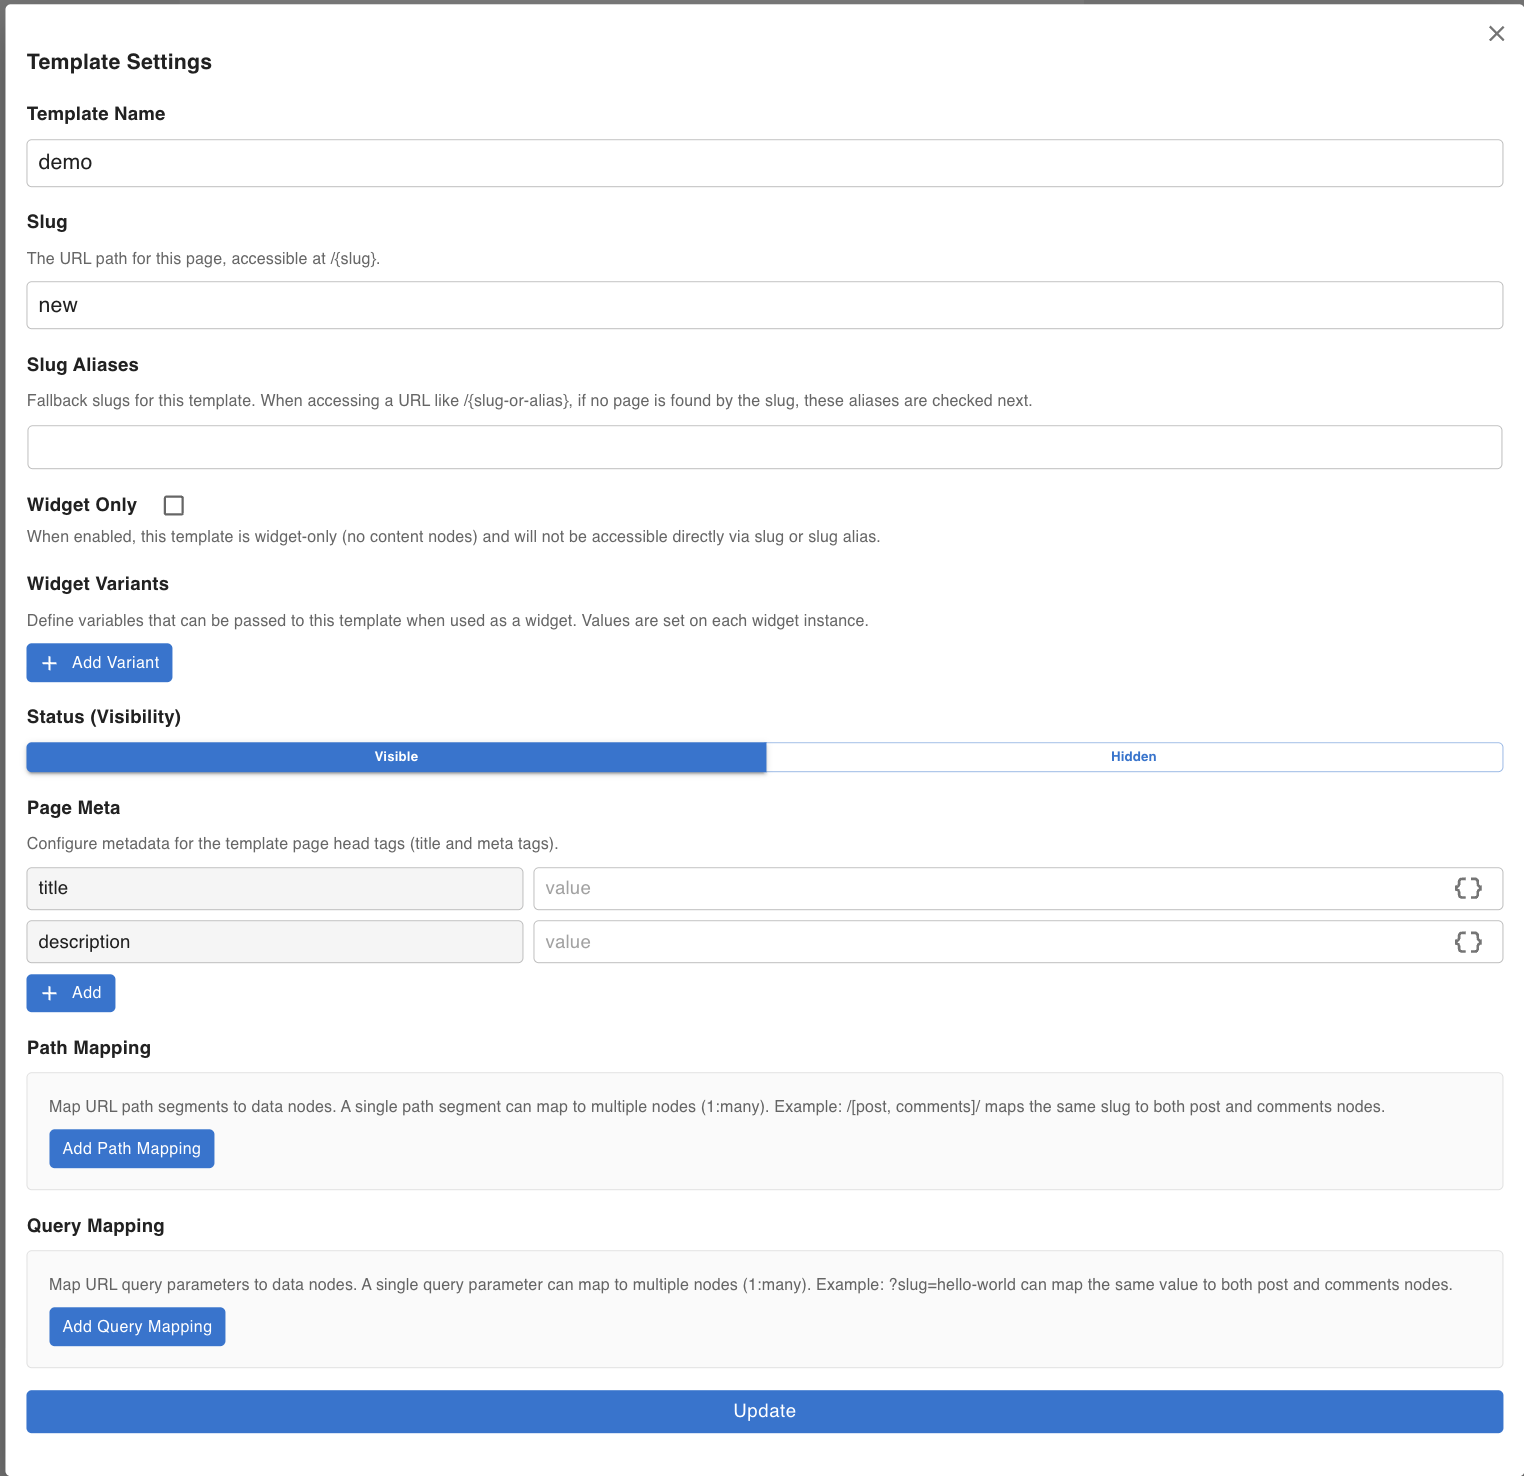
Template Settings
Open Template Settings via the gear icon in the Footer Toolbar. This modal is where you configure the template's identity, URL, widget behavior, metadata, and dynamic data bindings.
Template Name
The display name for the template. This is shown in the Template Navigator and used as the page <title> default if no Page Meta title is set. The name is required — the settings cannot be saved without it.
Slug
The slug determines the public URL of the page:
https://[domain]/[slug]
If left blank when the template is first created, a slug is generated automatically from the template name. You can update it at any time in Template Settings.
Validation rules: the slug must start with a letter or number and may only contain lowercase letters, numbers, hyphens (-), and underscores (_).
Some templates use reserved slugs (such as the homepage or error pages) — these slugs are read-only and cannot be changed. See Error & Home Pages for details on these reserved templates.
Slug Aliases
Slug Aliases are additional URL paths that resolve to this template. When a visitor accesses /{alias}, the system first checks for a primary slug match, then falls back to aliases.
This is useful when you rename a page slug and want the old URL to continue working — add the old slug as an alias so existing links are not broken.
Notes:
- Aliases follow the same validation rules as the primary slug.
- An alias must be unique across all templates — saving will fail if the alias is already used by another template.
- Slug Aliases are hidden for widget-only templates, since those templates are not directly URL-accessible.
Widget Only
When Widget Only is checked, the template is treated as a reusable component (like a shared header or footer) that is embedded into other templates via a Widget Node. Enabling this flag:
- Prevents the template from being directly accessible via its slug or slug aliases.
- Hides the Slug Aliases field, since the template is no longer URL-addressable.
- Hides Page Meta and Path/Query Mapping, since those only apply to page-level templates.
Widget Only is not available for the homepage or error templates, which always render at their fixed system slugs.
Widget Variants
Widget Variants are named variables that a parent template passes into this template when embedding it as a widget. They function similarly to props: the parent sets the values at embed time, and child nodes such as Template Text can read those values at render time.
Each variant has:
| Field | Description |
|---|---|
| Name | The variable name. Must be lowercase and contain only letters, numbers, hyphens, and underscores. |
| Type | string, number, or boolean. Boolean variants have no default value input. |
| Default Value | Optional. Used when the parent template does not supply a value for this variant. |
You can add multiple variants and remove them at any time. Variants with an empty name are discarded when the settings are saved.
See Widget Node for how to embed a widget template and pass variant values from the parent.
Page Meta
Page Meta controls the HTML <head> metadata for the published page. Two fields are always present:
| Field | Description |
|---|---|
| title | Sets the <title> tag content. |
| description | Sets the <meta name="description"> tag content. |
You can add additional key/value rows for custom meta tags (e.g. Open Graph fields like og:image or og:type). The key becomes the name attribute and the value becomes the content attribute.
Dynamic Data support: click the { } icon next to any value field to browse available data keys and insert them using ${key} syntax. This lets meta values reflect live content — for example, a post title or featured image URL pulled from a data-fetching node.
Page Meta is hidden when the template has Widget Only enabled, since widget templates do not render as standalone pages.
Path Mapping
Path Mapping binds URL path segments to data-fetching nodes in the template. This is how you build dynamic routes like /post/[slug] — where the segment in the URL determines which record the data node fetches.
A single path segment can map to multiple nodes (1:many), meaning one URL value feeds multiple data nodes simultaneously. Each mapping entry specifies:
- Name — the data-fetching node to receive the value (selected from nodes present on the canvas).
- Query Key — the specific query parameter on that node that the URL segment value is injected into.
- Required — when checked, the public page returns a 404 if this segment is missing from the URL. The Required option is only available for the first segment; subsequent segments can only be marked required if the preceding segment also has at least one required mapping.
Path Mapping requires at least one data-fetching node with Allowed Query Passthrough Keys enabled. If no such node is present on the canvas, a warning is shown instead of the mapping UI.
See Dynamic Data — Path Mapping for a full walkthrough.
Query Mapping
Query Mapping binds URL query parameters to data-fetching nodes. This covers cases like /posts?category=news, where a query string value drives what data is displayed.
Like Path Mapping, a single query parameter can map to multiple nodes (1:many). Each mapping entry specifies:
- URL Parameter Name — the query string key (e.g.
category,slug,page). - Name — the data-fetching node to receive the value.
- Query Key — the specific query parameter on that node that the URL value is injected into.
- Required — when checked, the public page returns a 404 if this query parameter is absent.
Query Mapping requires the same conditions as Path Mapping — at least one data-fetching node with passthrough keys enabled must be on the canvas.
See Dynamic Data — Query Parameter Mapping for a full walkthrough.