Animations
The Animations system lets you attach CSS-based animation rules to any node. Rules are triggered by user interactions (hover, click, scroll, etc.) and use either preset keyframes or your own custom-defined ones.
See Animation Examples for ready-to-use templates demonstrating what the animation system can produce.
Animations are currently experimental.
Almost every node and element has an Animation tab in the right panel form. Select a node on the canvas and click the Animation tab to manage its rules.
Adding a Rule
Click Add Rule to create a new animation rule for the selected node.
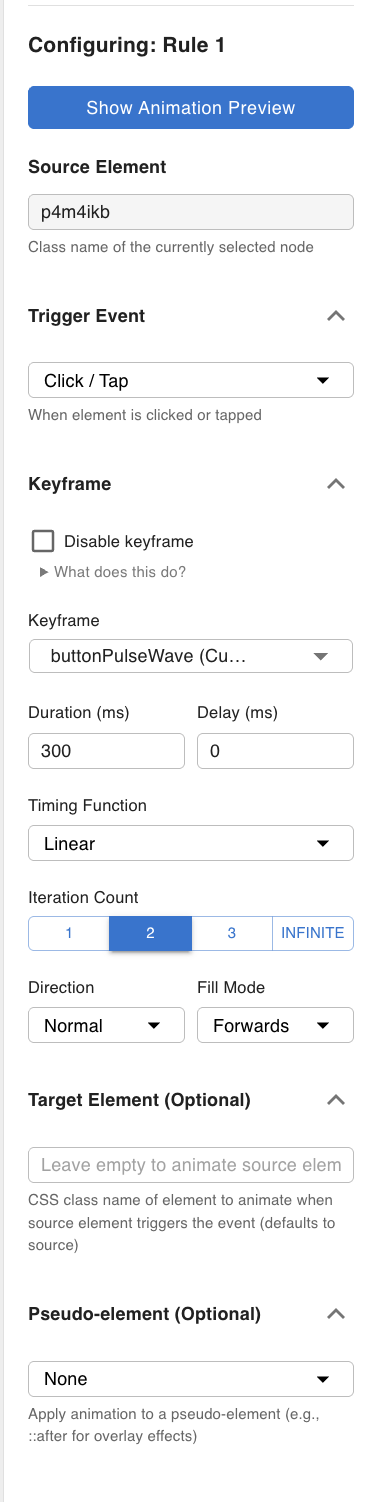
Each rule has the following key fields:
Trigger Event
Sets when the animation fires — for example, when the user hovers over or clicks the element.
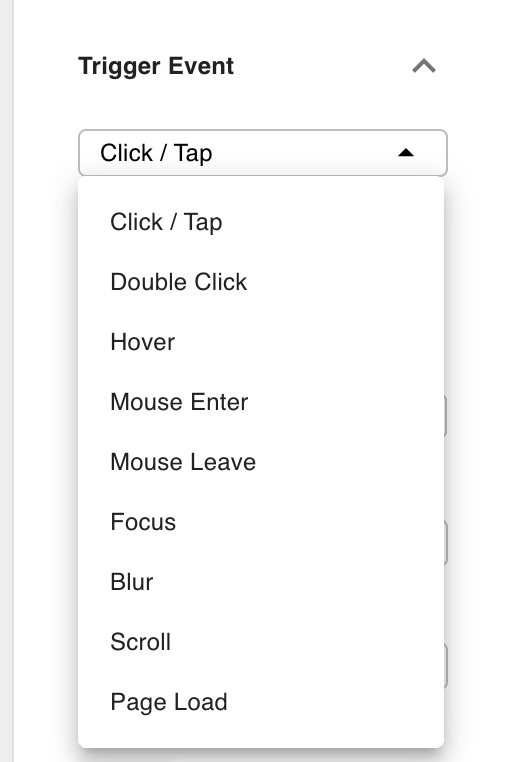
Available trigger events: hover, click, dblclick, mouseenter, mouseleave, focus, blur, scroll, load.
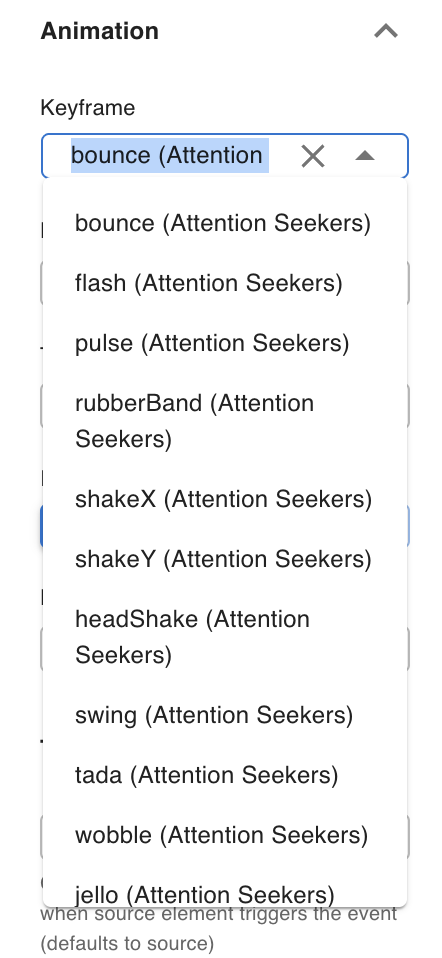
Keyframe
Selects the animation preset to play. The preset library covers attention seekers (bounce, pulse, tada), entrances/exits (fade, zoom, slide, rotate), and more. Select the preset that fits the effect you want. Presets are standard CSS @keyframes rules under the hood.
You can also turn off the keyframe entirely and use only the Pseudo Element settings — useful when you only want to mutate styles on a pseudo-element without playing a keyframe animation (see Pseudo Element below).
See Custom Keyframes for creating your own keyframe presets.
Target Element
By default the animation runs on the element itself. If you want the animation to play on a different element when this element is triggered, assign a CSS class name as the target.
The selector generated for a cross-element target uses CSS :has(): when the source element matches the trigger, the target element receives the animation.
Pseudo Element
Directs the animation (and any custom properties) at the element's ::before or ::after pseudo-element instead of the element itself. Selecting None targets the element directly.
This is useful for overlay effects — for example, animating a color fill or underline that is rendered as a pseudo-element so the actual element content is not affected. Because pseudo-elements require a content property to render, you will typically pair this with Custom Properties (see below) to set content: "" and any other required properties like position: absolute.
Custom Properties
Additional CSS properties injected into the animation rule block alongside the animation shorthand. For pseudo-element rules, this is where you define properties like content: "" and position: absolute that the pseudo-element needs in order to exist on the page.
Custom Keyframes
You can define your own keyframes and use them in any animation rule alongside the built-in presets.
Click Manage Custom Keyframes at the top of the Animation tab to open the keyframe manager.
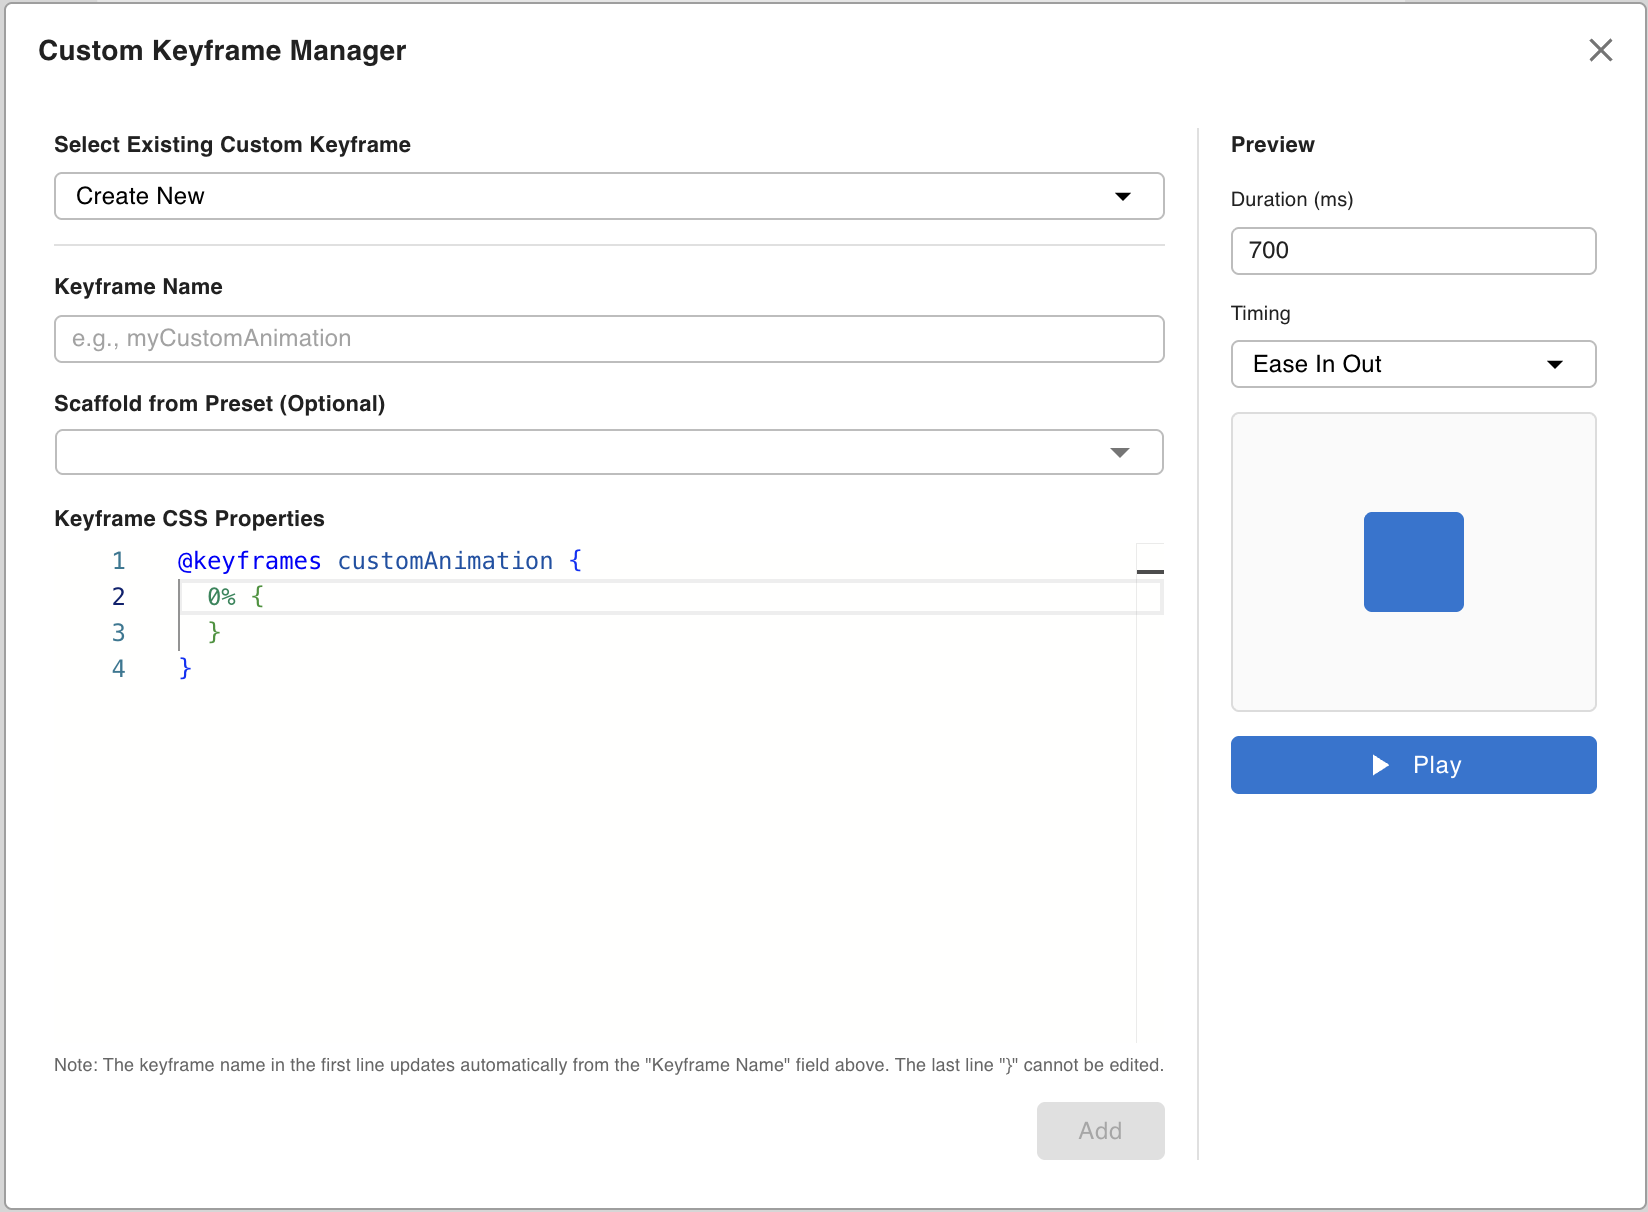
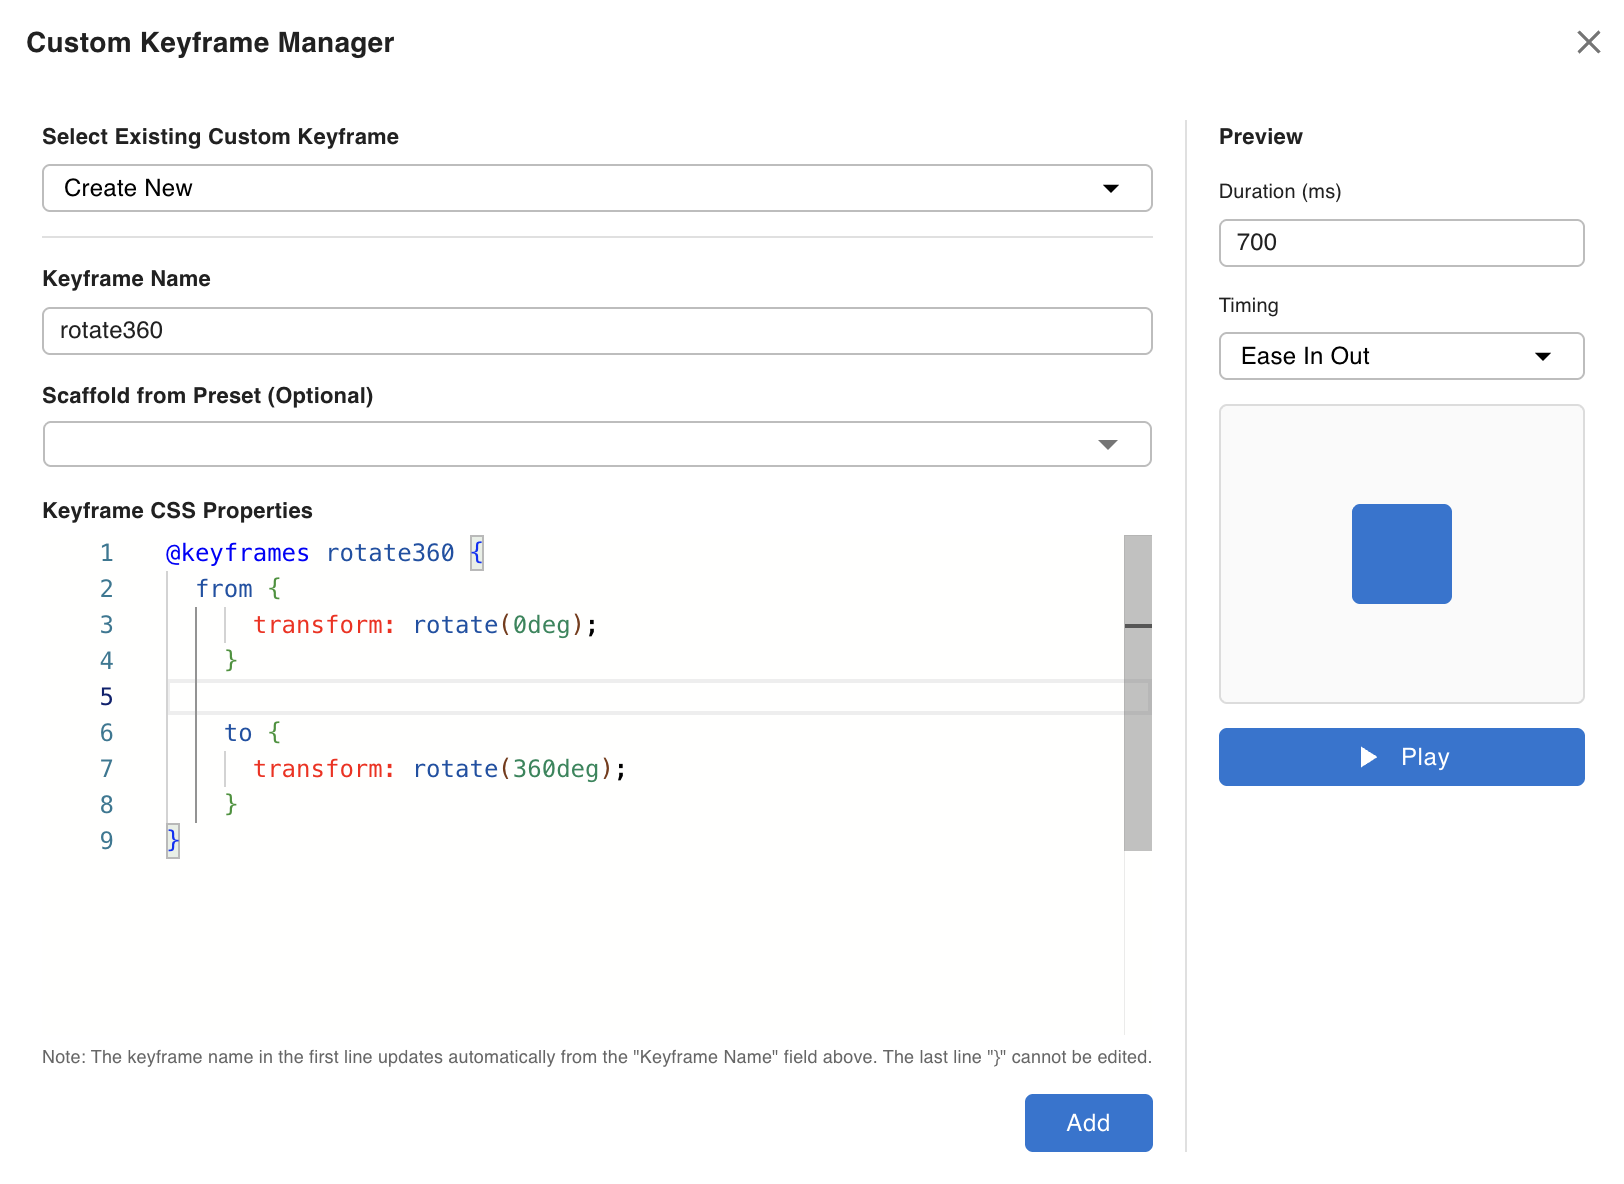
Creating a keyframe
- Select Create New from the Existing Custom Keyframe dropdown.
- Enter a Keyframe Name — this is the name that appears in the keyframe dropdown when creating rules.
- (Optional) Select a default keyframe as a scaffold — the editor pre-fills the code editor with the selected preset's keyframe CSS so you can modify it rather than starting from scratch.
- Write your keyframe CSS in the Code Editor section.
- Click Add to save.
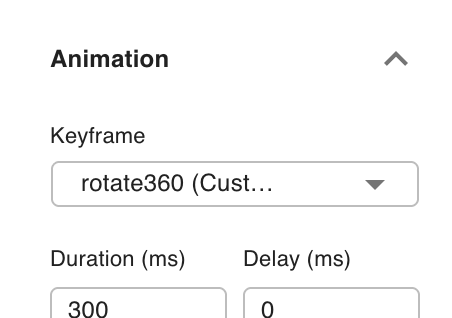
After saving, the new keyframe appears in the Keyframe dropdown when configuring rules.
To update or delete an existing keyframe, select it from the dropdown and use Update or Delete.
Preview
The right side of the modal contains a live preview panel — use it to verify how the keyframe looks before applying it to an element.
Writing keyframes with AI
Writing keyframe CSS by hand is tedious. It is faster to describe the effect to an AI tool (ChatGPT, Claude, etc.) and paste in the generated @keyframes block.
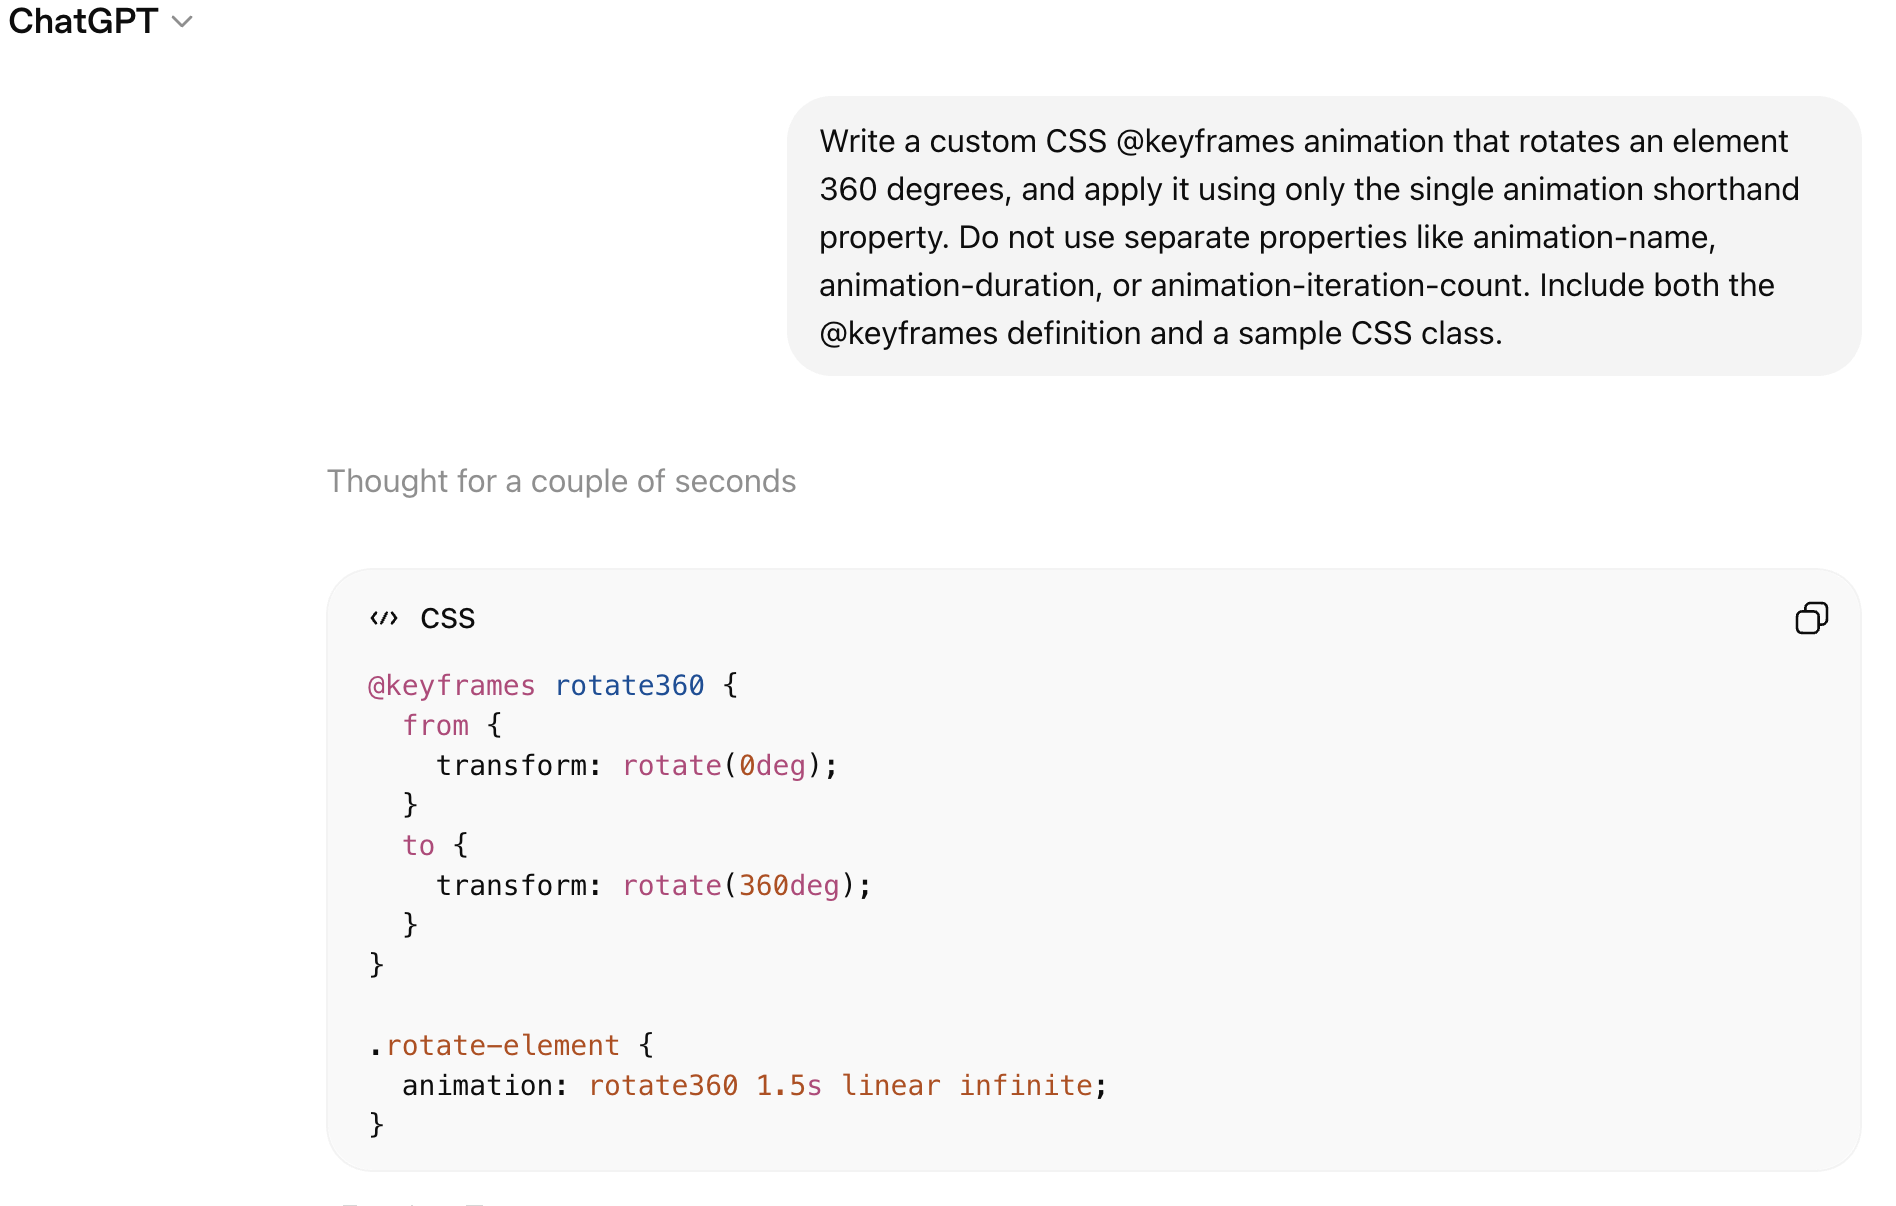
You can also use the wp-next-editor-template Claude Code skill, which can read and modify the full template JSON — useful for applying animations to multiple elements at once.