Using Tailwind
The editor's Additional Class Names field accepts any CSS class name, which makes it straightforward to use Tailwind CSS utility classes. The most practical way to load Tailwind without a build step is via the Play CDN.
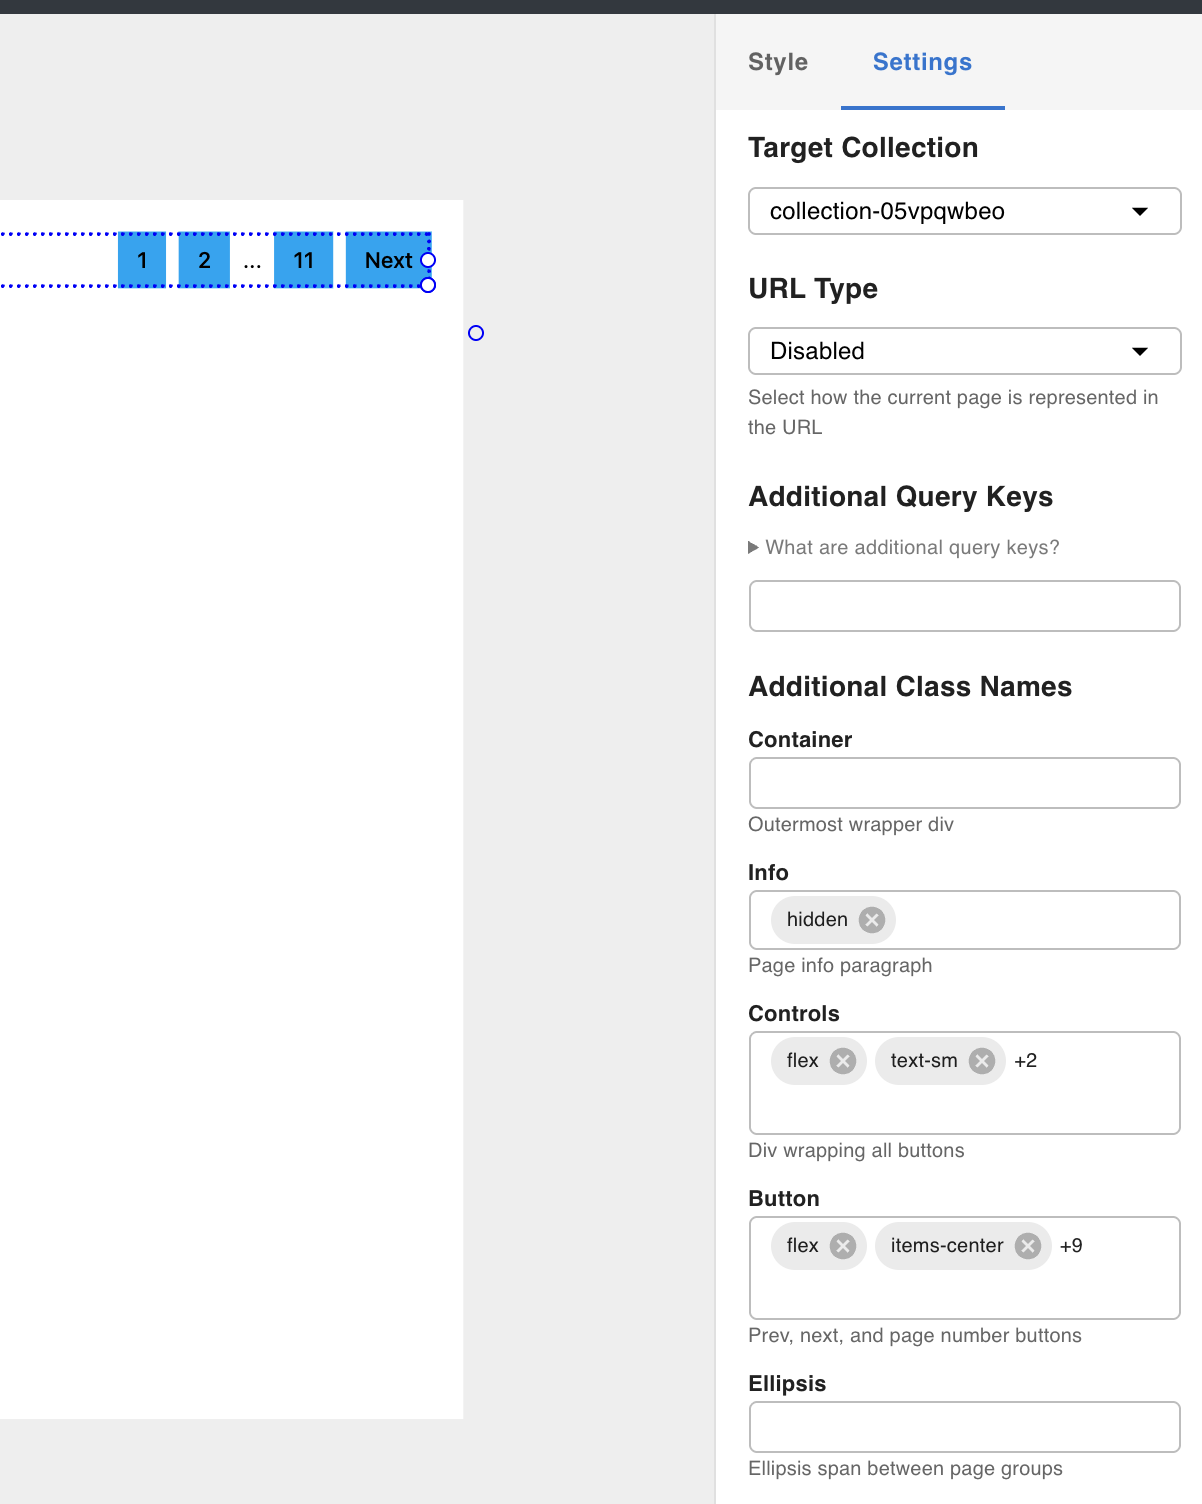
This example shows how to apply Tailwind classes to a Pagination component to style its controls.
Related docs:
- Custom Code — how to create and manage HTML/CSS/JS snippets
- Collection & Pagination — Pagination node structure and settings
1. Create a Custom Code snippet for the Tailwind CDN
Go to the Custom Code panel and create a new snippet with the following HTML:
<script src="https://cdn.jsdelivr.net/npm/@tailwindcss/browser@4"></script>
See the Tailwind Play CDN docs for more information on this approach.
2. Add the snippet to your template
Open Footer Toolbar → Custom Code and add the Tailwind CDN snippet to the header injection location.
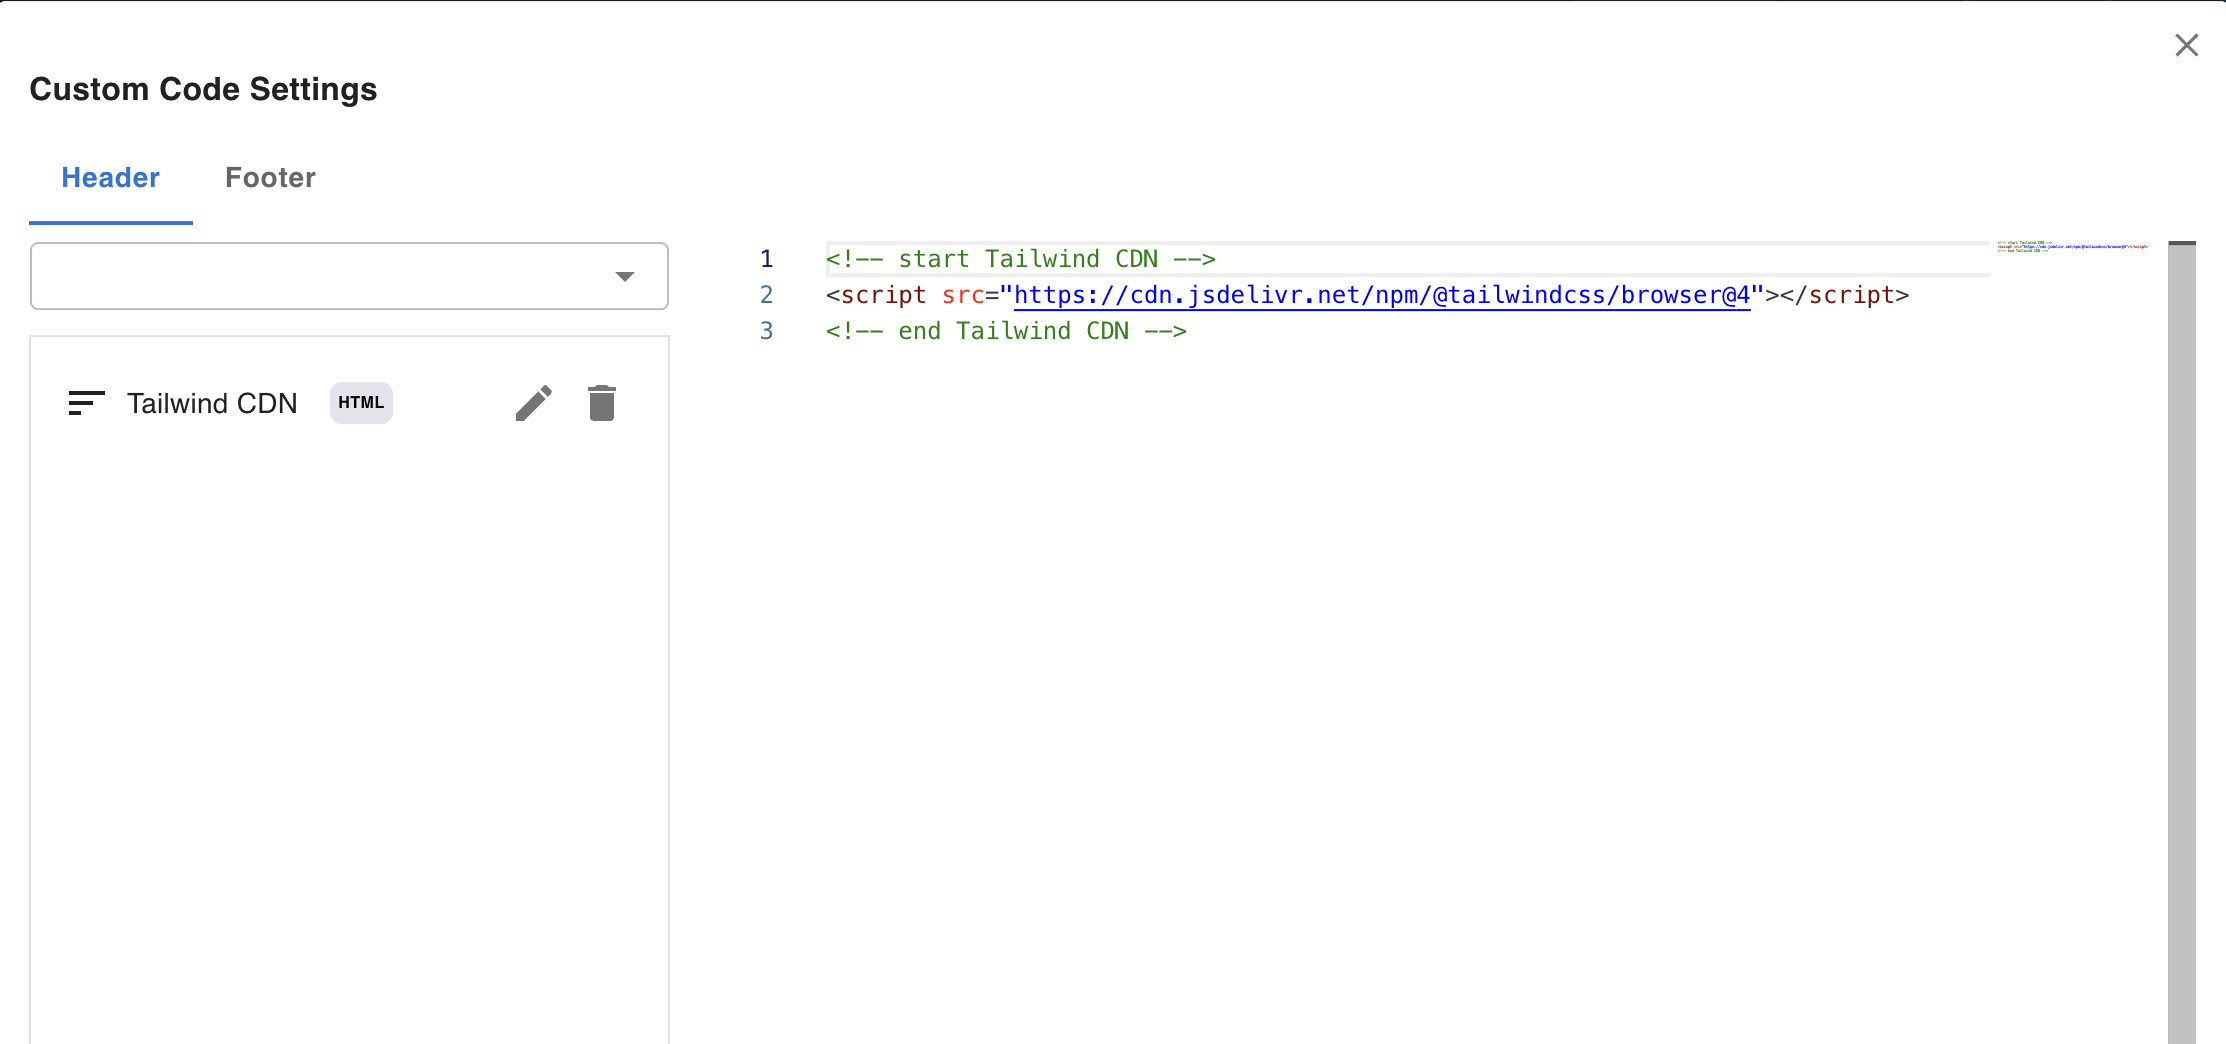
The script will be injected into the <head> of the rendered page and the canvas preview, making Tailwind classes available to all elements in the template.
3. Apply Tailwind classes to Pagination elements
Open the Settings tab on the Pagination node. Each sub-element of the Pagination component accepts class names in its Additional Class Names field.
Add the following classes to the respective elements:
Info (page count label — hidden by default since Tailwind's hidden applies display: none):
hidden
Controls (the pagination bar container):
flex text-sm gap-2 items-center
Button (each page/prev/next button):
flex items-center justify-center text-body font-medium text-sm px-3 h-9 focus:outline-none bg-sky-500/100 hover:bg-sky-700
Result